Learn how to draw a chinchilla with a soft pencil, simple guide shapes and twelve manageable stages. This lesson builds a cute seated long-tailed chinchilla in three-quarter view: a rounded head, a chubby body and a bright near eye. The finished picture uses blue gray and lavender colored pencil with a cream belly. You can stop at the graphite stage or continue into color.
Draw lightly at first and pause after each stage. The orange circles identify the steps; they are not part of the animal. Keep the drawing in the same place on your own page rather than starting a new animal every time. A small change in a curve is normal, and you do not need to copy every tiny fur stroke for a successful result.
If you would rather begin with an outline, try this related animal coloring page or browse our free coloring pages. For another rounded animal, follow how to draw a capybara; for a different ear and tail shape, compare how to draw a cat.
Materials and a Comfortable Setup
Use an HB or 2H pencil for the guides, a softer 2B pencil for selected contours, a clean eraser and cream or white drawing paper. A kneaded eraser is useful because you can lift graphite by pressing instead of scrubbing. Colored pencils are easier to layer over delicate shading than wet markers. Keep a scrap sheet under your drawing hand to reduce smudges.
Leave room above the head for the ears and beside the body for any tail. Use your whole forearm to sketch a loose oval, then choose the best line from two or three light passes. Pressing hard too early creates grooves that remain visible when you color. If a young child finds the first shapes difficult, make the drawing larger rather than asking for smaller, tighter pencil movements.
Chinchilla Anatomy Tips for Artists
A chinchilla combines very dense-looking fur, large rounded ears and a full curved tail. Avoid drawing a bare rat-like tail or tiny hamster ears. The body is compact, with a rounded back and broad haunch. Leave a small gap between the outer fur contour and the imagined skeleton: that airy edge suggests plush fur without making every hair a long spike.
In three-quarter view, the near side is more visible than the far side. Make the near eye larger and clearer; let the far eye become a small sliver rather than a matching circle. The muzzle turns slightly toward the viewer, while the body still points left. Connect head and body with gentle curves so the animal looks like a living form rather than two stickers pressed together.
- Use large upright rounded ears as the main ear-shape cue.
- Build tiny forepaws and broad hind feet below the body, not floating beside it.
- Remember a fluffy curved tail when checking the silhouette.
- Keep the darkest marks around the near eye, nose and deepest overlaps.
How to Draw a Chinchilla in 12 Steps
Read each instruction before adding the next group of lines. Stages one through seven establish the shape; stages eight through ten refine the pencil work; the final two add color. Check the overall balance before you worry about individual whiskers.
Step 1: Sketch the body oval

Start with a broad oval for the chinchilla’s body. Place it slightly below the center of the available drawing space, leaving plenty of room for the head and ears. Keep the first line pale enough to lift with an eraser. Think about a soft three-dimensional mass, not a rigid geometric symbol. The lower curve establishes where the animal will sit, so do not flatten the body into a narrow tube. Before moving on, check that the oval leaves space for the feet.
Step 2: Add the overlapping head guide
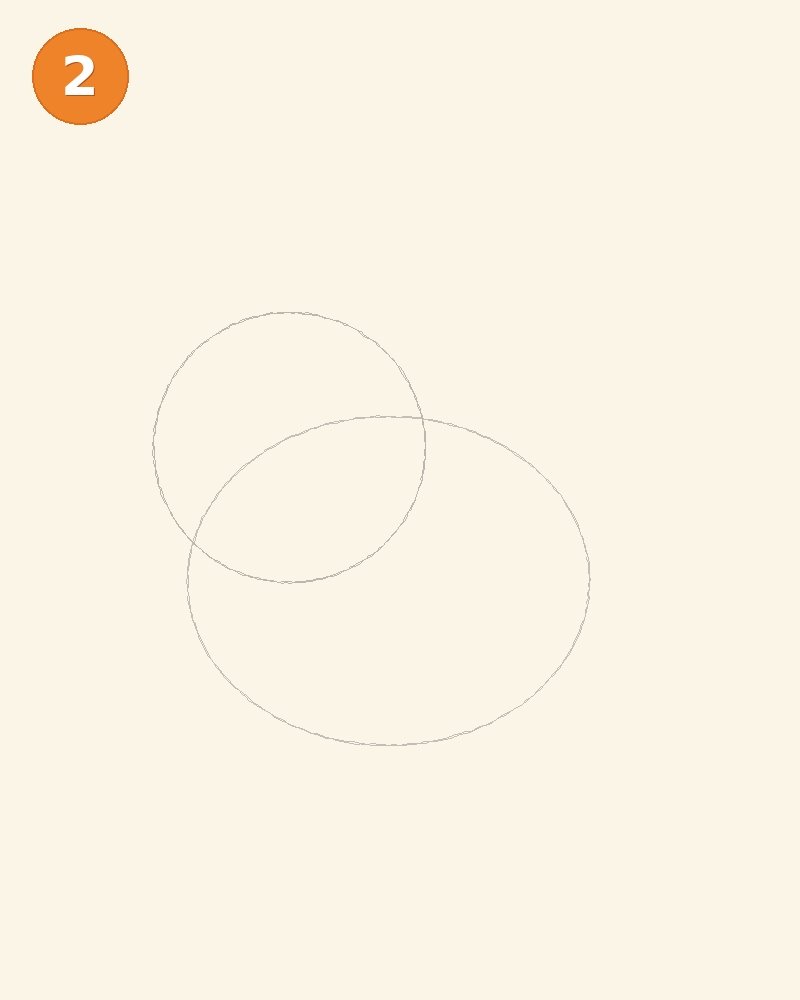
Add an overlapping head circle toward the upper left of the body guide. Let the two shapes cross slightly; the overlap will later disappear beneath the chest contour. The head should be large enough for a cute expression without completely covering the body. Compare the widest part of the head with the widest part of the body using your pencil as a simple measuring tool. Keep the far side of the head slightly narrower so the pose starts to turn in space.
Step 3: Place large rounded ears, with the far ear partly hidden
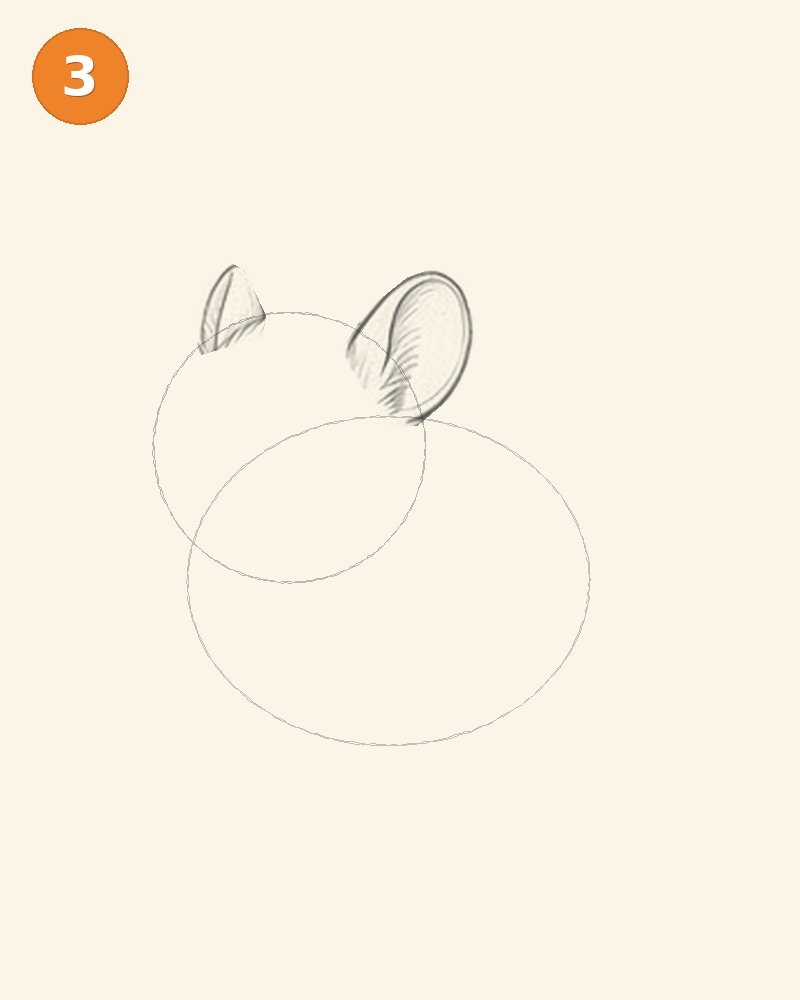
Place large upright rounded ears on the top of the head. Attach each ear at its base instead of balancing it above the skull. The far ear can be smaller or partly hidden because the head is turning. Sketch the outer forms first, then suggest an inner edge with a lighter curve. Avoid darkening every ear line equally: the open interior should stay gentle. Look back at the body guide to make sure the ears still belong to the same scale of animal.
Step 4: Mark the compact muzzle and nose
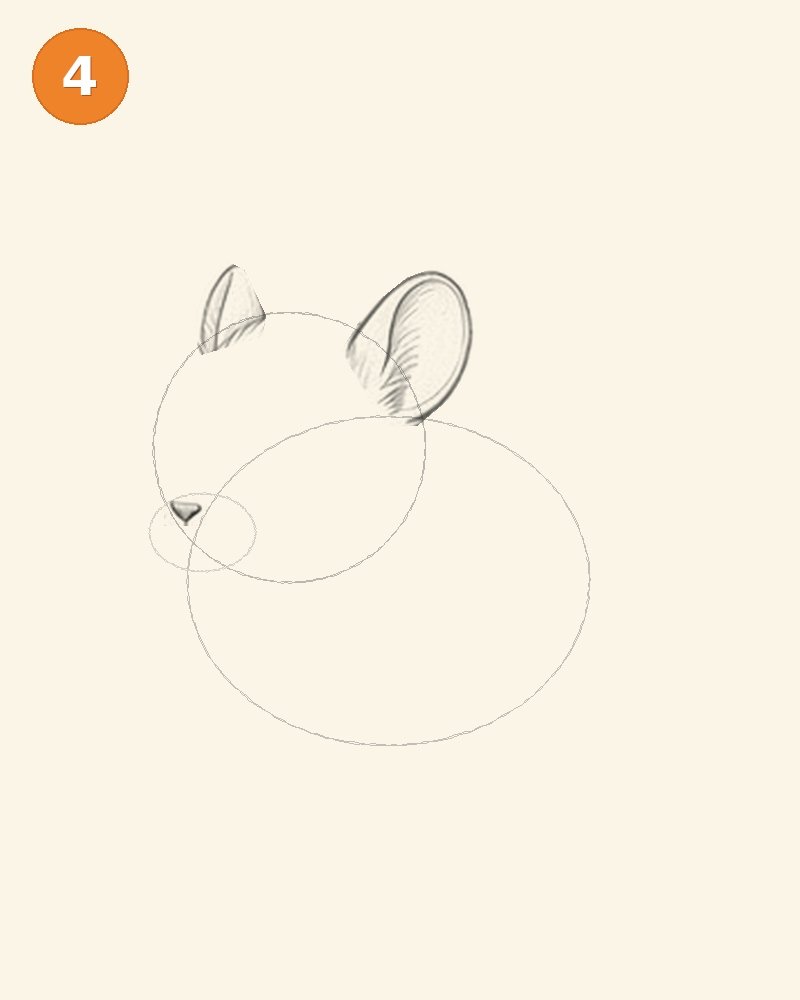
Place a small, rounded muzzle guide at the front of the head, and mark the tiny nose at its leading edge. In this three-quarter pose, the near cheek has more space than the far cheek. Keep the projection short: a long snout changes the animal’s character. The nose is already present in this stage, but the eye comes next. Leave the head and body construction curves pale. Check the muzzle against the ear bases before you darken anything; all of these features must remain on this same head throughout the lesson.
Step 5: Keep a bright eye highlight
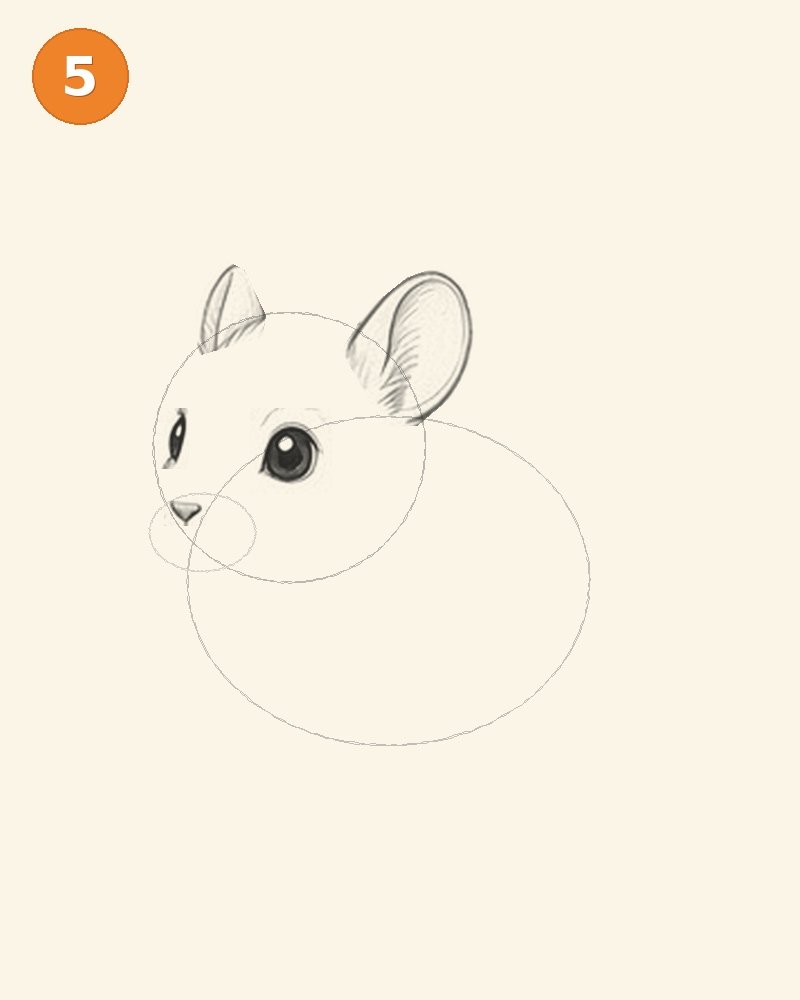
Place the large near eye above the muzzle and slightly behind the nose position. Add a much smaller indication of the far eye if it is visible. Reserve one clean highlight before you shade the pupil; this is easier than trying to erase a highlight out of a heavily pressed black circle. Use a darker upper edge and a softer lower edge. Do not move the eye between stages: small corrections are fine, but the expression should develop on the same head.
Step 6: Refine the head outline and smile
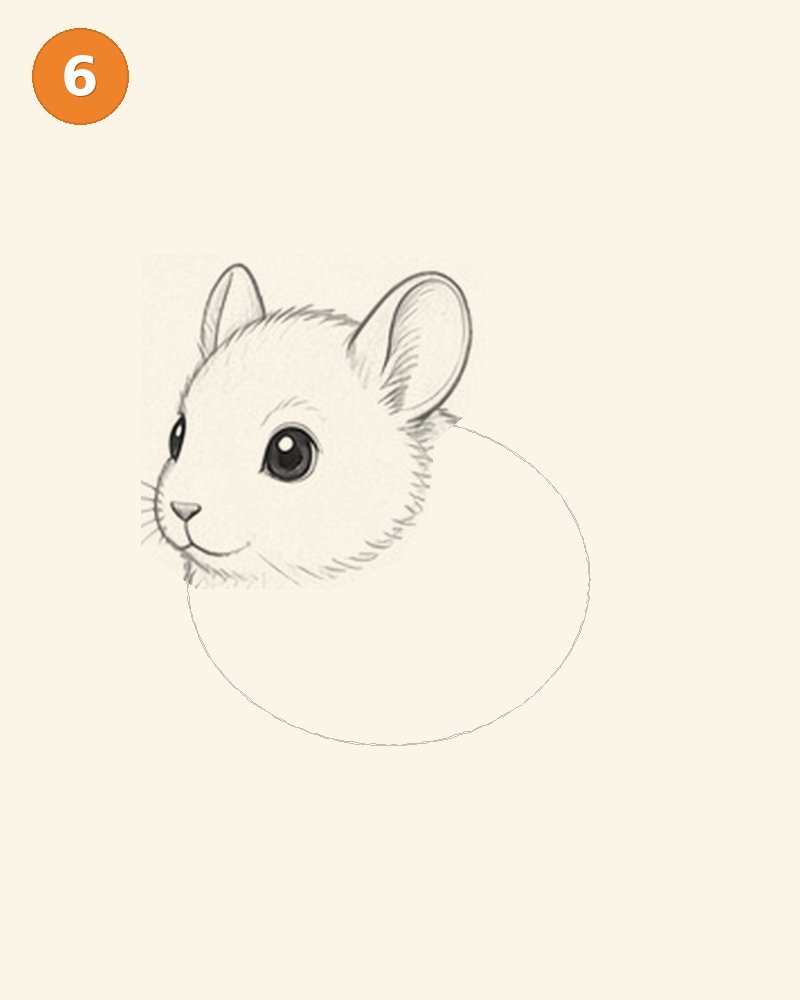
Refine the outer head contour around the features you have already placed. Keep the entire ear silhouette and the shiny eye in their established positions. Add the little mouth curve beneath the nose rather than relocating the nose. Replace the smooth cheek guide with short, soft graphite edges, and lift the head and muzzle construction lines. The large body oval stays visible for the next stage. If a few whisker marks are already present in the pencil reference, retain them lightly; you will refine the whisker accents later, not erase the face and start over.
Step 7: Complete the body, paws and tail
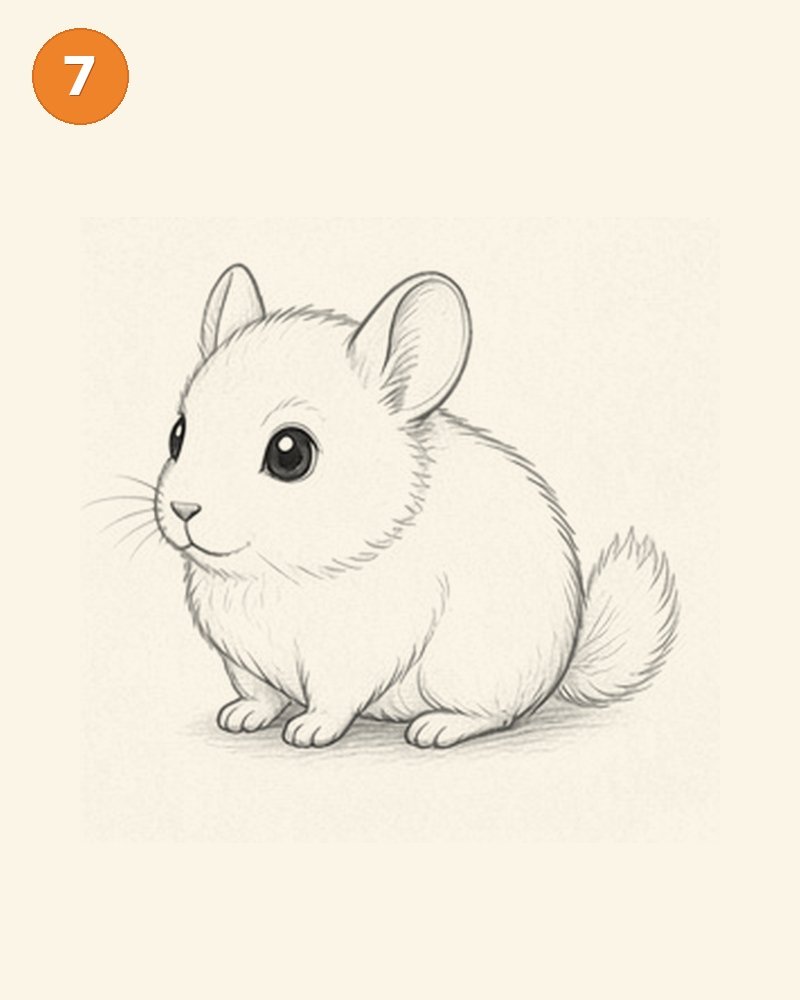
Use the body oval to build the rounded chest and haunch, connecting them to the finished head without changing its size or angle. Add small front paws and the broader hind foot shapes. Include a fluffy curved tail, as shown. Let the near forms overlap the far forms so the animal sits naturally in three-quarter view. Now lift the body construction oval: the full animal outline, feet and tail are present in this stage. Keep the ground level consistent and compare the eye, ears and nose with the previous image before continuing.
Step 8: Build fine fur texture
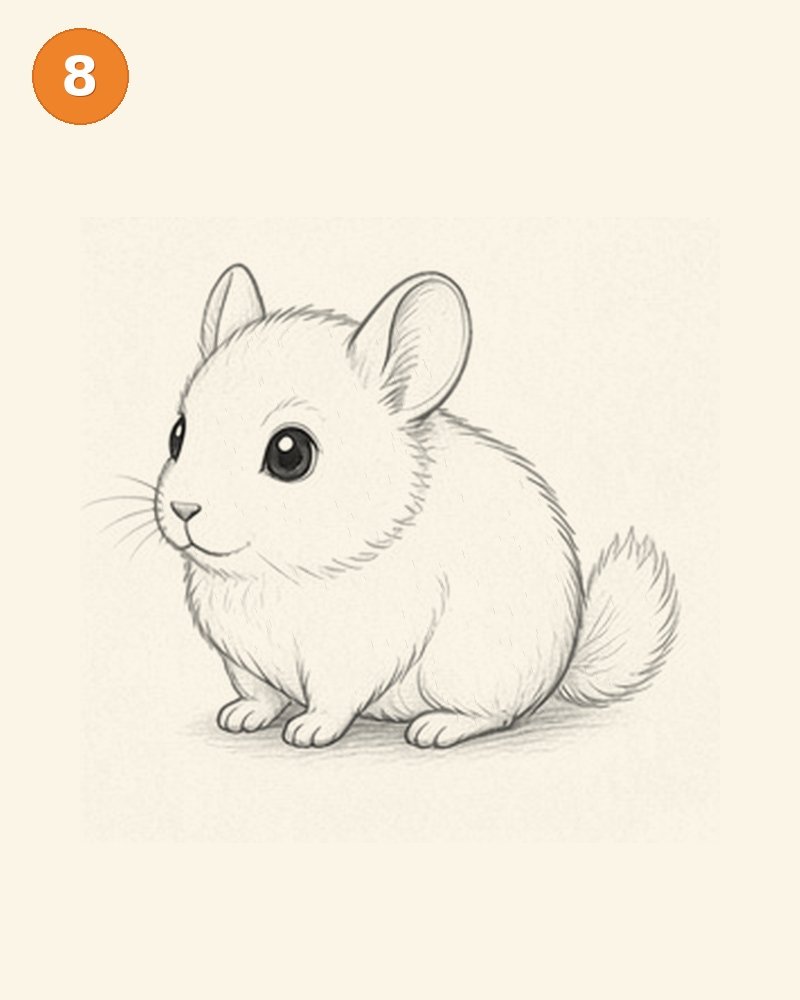
The whole animal is now outlined, so this stage develops texture rather than replacing the pose. Lay a few fine graphite strokes inside the cheek, shoulder and body, following the direction in which the fur lies. Keep the eyes, nose, ears, paws and tail exactly where they were. Work lightly enough for the cream paper to remain visible between the marks. Avoid drawing a heavy dark border around every contour; tiny variations in pressure make the coat feel soft. Turn the pencil slightly between strokes to keep the texture delicate instead of scratchy.
Step 9: Refine whisker accents
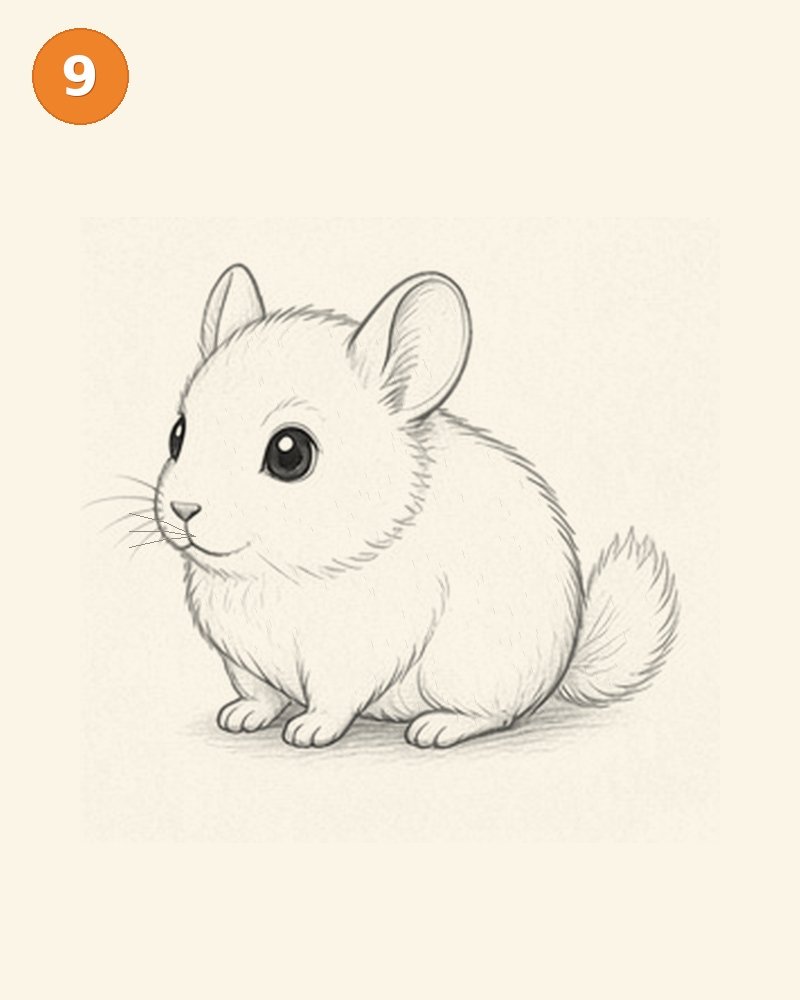
Refine the whisker accents and add a few extra fur strokes where the cheek turns toward the muzzle. Some source-pencil whiskers may already be visible from the head-outline stage; these are retained, not moved or replaced. Keep the new accents fine and slightly varied in length. The construction ovals have already been removed, so do not redraw them. Check the eye highlight and the open inner-ear shapes before proceeding. A small number of deliberate marks reads more clearly than a dense fringe of dark, identical lines covering the face.
Step 10: Shade the graphite form
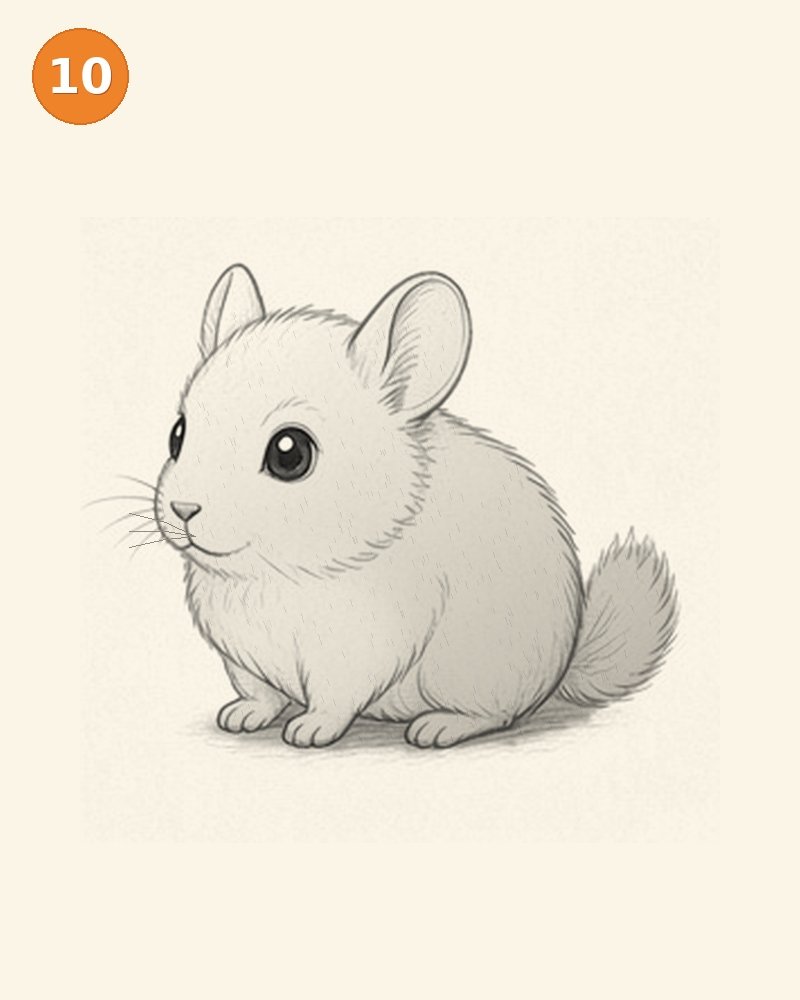
Choose one light source, here imagined above and to the left. Shade gently beneath the chin, along the lower belly and where the feet meet the ground. Build graphite in two or three pale layers instead of pressing hard once. Keep the upper forehead and back lighter. The ground shadow should be soft and compact, not a thick dark stripe. If a shaded area gets too heavy, lift it with the eraser and blend the surrounding tone with light pencil strokes.
Step 11: Lay a cool slate gray pencil base
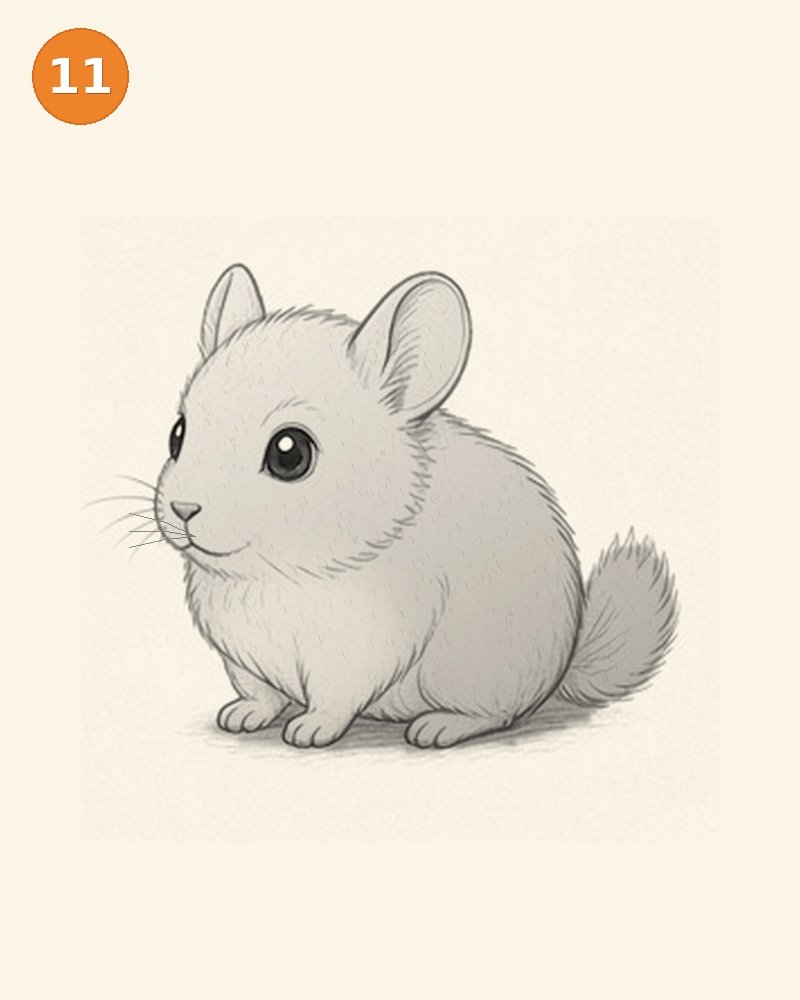
Apply a translucent cool slate gray colored-pencil base over the coat, leaving the belly lighter. This is a subtle first color layer, not an opaque repaint of the graphite. Use a light hand so the pencil grain and cream paper continue to show through. Keep the shiny eye and its white highlight untouched, and preserve the original nose and mouth. Work around the ear edges and small feet with short strokes rather than filling across their outlines. Compare the silhouette with stage ten: color changes, but the animal’s geometry does not.
Step 12: Finish with subtle colored-pencil accents
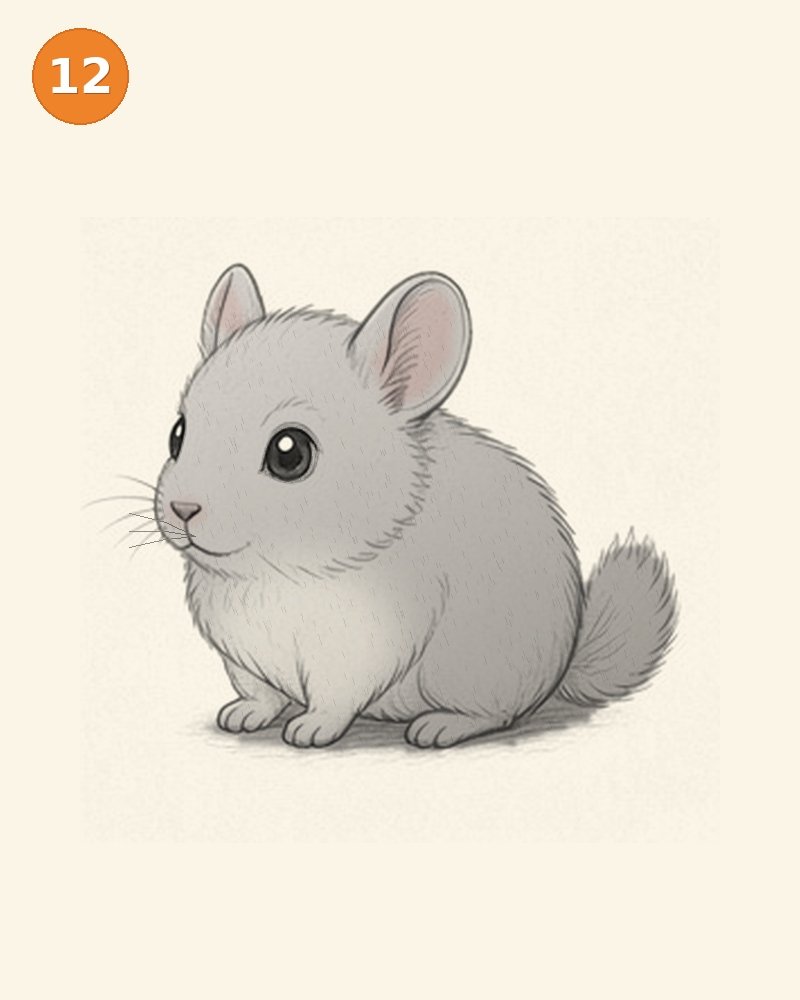
Complete the drawing in slate gray with delicate pink inner ears. Deepen the coat selectively while preserving the graphite texture beneath it. Keep the chest and belly pale, soften the transitions, and leave the dark eye crisp with its bright highlight intact. The final colors are deliberately gentle and natural rather than a flat cartoon fill. Compare the ear tips, nose, feet and tail with the earlier graphite stages: none should have moved. Stop when the animal looks rounded and readable. A last light pass is usually more successful than pressing hard to make every patch equally dark.
Common Mistakes and Gentle Fixes
A flat body: widen the belly and preserve a curved back before adding fur. A face that looks pasted on: connect the muzzle to the cheek with a softer curve. Matching eyes: reduce the far eye so the head turns naturally. Heavy guide lines: dab them away before layering color. Floating paws: compare their contact points and add a light ground shadow.
If the drawing starts to look like another species, return to the ear shape, muzzle length and tail. Those three silhouette cues usually matter more than the coat color. Make one correction at a time and recheck the whole animal. Do not repeatedly erase the same small patch until the paper becomes rough; a fresh practice sketch can be kinder to both the paper and the artist.
Coloring Ideas and a Cute Kawaii Variation
For the main version, use blue gray and lavender with a cream belly. Add a cooler pencil in the deepest shadows and keep the upper surfaces warmer. For a pastel version, replace the natural coat with pale peach, lavender or mint while leaving the eye dark. A kawaii variation can have a slightly larger head, smaller paws and two small blush spots. Keep the species-defining ears and tail so the animal remains recognizable.
Try drawing the same pose a second time with fewer fur marks and a simpler face. Compare the two rather than deciding that one is right and the other wrong. A birthday card, a tiny name tag or a garden background can come later, but practice the animal alone first. More activities are available in our free printables hub and animal wallpaper collection.
Frequently Asked Questions
Is this chinchilla drawing suitable for beginners?
Yes. The lesson starts with two guide shapes and adds one group of features at a time. Younger children can stop after the clean outline and use crayons. An adult can help identify the overlapping shapes without drawing the whole picture for them.
Do I need special pencils?
No. One ordinary pencil, paper and an eraser are enough. A softer pencil makes dark accents easier, and colored pencils add the final color, but the important skills are light pressure and comparing shapes.
Why does my drawing look different?
Small changes in proportions create a different personality. Check the head-to-body relationship, eye placement and ear silhouette before comparing tiny details. Your drawing does not need to be identical to the example.
Can I trace the early shapes for practice?
You can use the early guide shapes as a practice aid, then try a second version freehand. Focus on understanding where the shapes overlap. Tracing is most useful when you notice the structure rather than only following the outside edge.
Should I outline it with a marker?
That is optional. A fine pen creates a stronger cartoon effect, but the house style here uses soft graphite and colored pencil. If you ink your drawing, let the ink dry before erasing guides and test whether your coloring tools make it bleed.
What should I draw next?
Try the cat or capybara tutorials linked above, then choose another animal with a different silhouette. Repeating the simple oval-and-head method builds confidence while new ears, paws and tails teach you to observe species differences.
For another rounded pet with the same gentle pencil approach, try how to draw a hamster or how to draw a guinea pig. Compare their ears and tails with this animal rather than copying the proportions unchanged.