Learning how to draw a hedgehog is easier when you separate its soft face from the spiky cloak on its back. In this twelve-step lesson, a few light ovals become one friendly rounded animal on cream sketchbook paper. We keep the same eye positions, ear shapes, feet and body outline throughout the sequence, then gradually introduce quills, soft fur, shadows and colored pencil. The pose is a gentle three-quarter view rather than a flat side silhouette, so the near eye and ear are more prominent. Take your time with the large shapes before drawing the quills. A small number of well-organized forms will make the finished hedgehog much clearer than a page full of hurried spikes.
What you need for this hedgehog drawing
Choose a regular graphite pencil, a soft eraser and a sheet of warm white or cream paper. An HB pencil works for the guides; a softer pencil can deepen small shadows, but one ordinary pencil is enough. Colored pencils are optional for the final two stages. Keep a clean scrap sheet under your drawing hand to reduce smudging. Use light pressure for planning, medium pressure for selected contours and stronger pressure only for small dark details. An adult can help younger children prepare a sharp pencil safely. Do not worry about finishing quickly: pause after the guide shapes and again before adding texture. These checks prevent small placement mistakes from becoming difficult corrections later.
Understand the hedgehog anatomy
A hedgehog is not a rodent, and its quills should not be treated as porcupine needles. For this cute drawing, think of a rounded back covered in short pointed spines, with a soft furry face, underside and little legs. The muzzle projects forward from the head but ends in a small rounded nose rather than a long needle point. The ears are rounded and sit within the transition between the pale face and quilled back. In a three-quarter view the far eye and far ear appear smaller because they turn away from us. Our seated animal has a large domed back, but the feet must still emerge from underneath it in believable places. Do not cover the cheeks or front paws with quills. The contrast between the smooth soft face and the layered spine cloak is the main feature that makes this animal immediately recognizable.
Follow the 12 cumulative drawing steps
Step 1: Sketch the rounded body guide
Place a generous upright oval in the lower middle of the page. This guide establishes the domed back and the overall weight of the animal, so leave room outside it for the quill tips. Keep the pencil line light and slightly loose rather than tracing a thick perfect shape. The lower portion should leave enough space for three visible feet and a subtle ground contact. Do not fill the oval with spikes yet. At this stage you are planning the animal's size and position only.

Step 2: Overlap a smaller head oval
Draw a smaller horizontal head oval toward the lower left of the body guide. Let it overlap the body, showing that the face projects forward from the rounded back. The head should remain much smaller than the whole quilled mass. Compare the two shapes from a little distance before proceeding. If the head sits too high, the animal may look upright like a teddy bear; if it is too low, the nose may appear to touch the floor. Keep both guides available for positioning the ears and muzzle.

Step 3: Add the rounded ears
Set two small rounded ears above the head guide. The far ear on the left is narrower, while the near ear on the right shows a larger inner surface. Make each ear a soft rounded flap, not a sharp triangle or an extra quill. Add a pale inner curve and leave the tips complete. Their bases will eventually blend into the face and spine cloak. Check their spacing now, because the same ear positions will be retained through the finished colored-pencil stage rather than adjusted later.
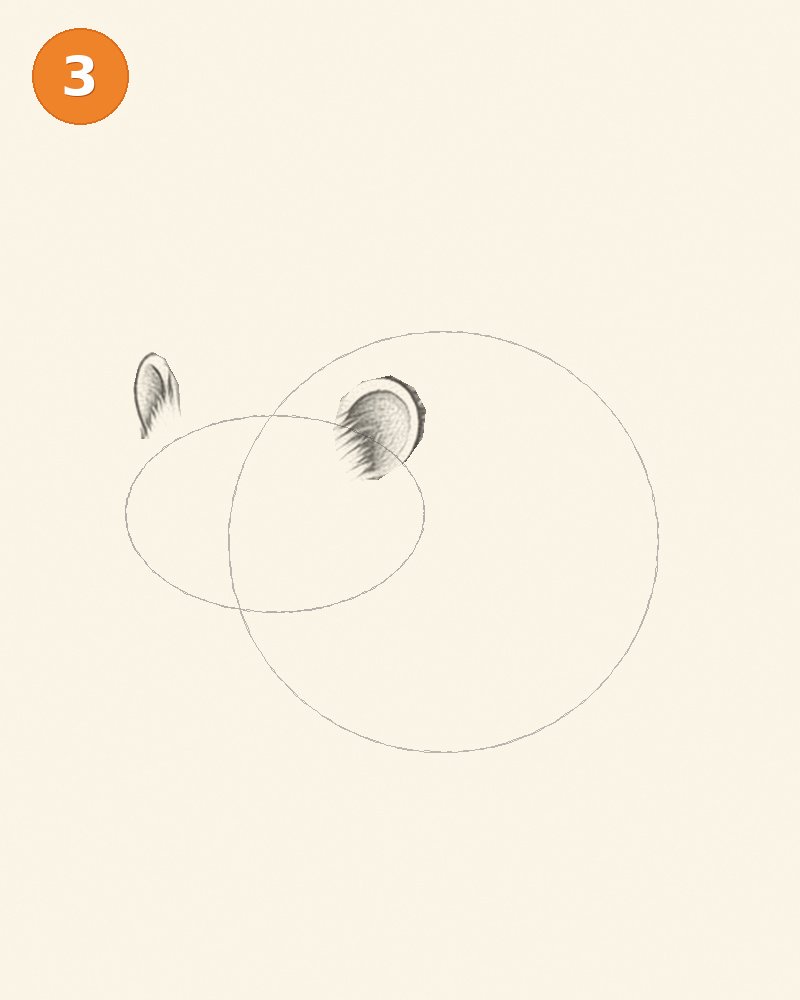
Step 4: Define the projecting muzzle
Use the head guide to shape the little forehead and projecting cheek, then add a compact muzzle guide at the front. The nose will sit at its tip, facing slightly left and toward us. Keep the underside of the muzzle gently rounded instead of drawing a straight triangular wedge. This stage begins the actual face outline but leaves the large body and head planning ovals visible. Avoid adding stray quill fragments above the face before you know where the complete back cloak belongs. Work on the soft facial structure first.
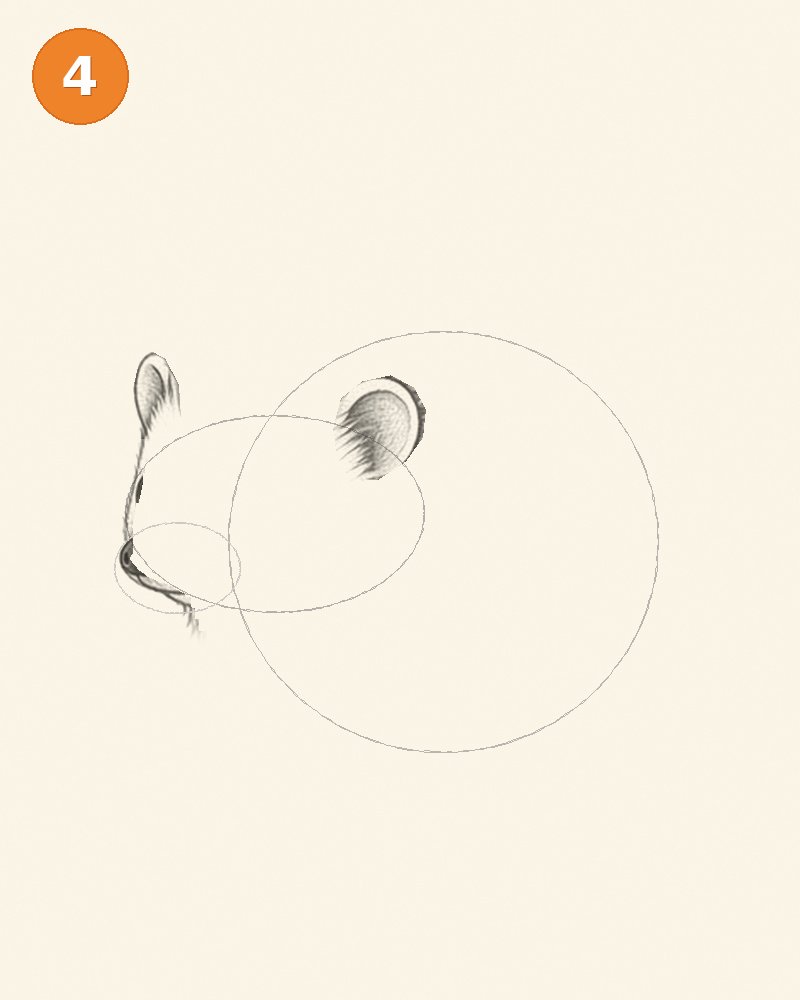
Step 5: Place the eyes, nose and tiny smile
Draw the larger near eye on the visible right side of the face and the smaller far eye closer to the left contour. Fill the pupils gradually while reserving a tiny clean highlight. Add a rounded dark nose at the muzzle tip and a small curved mouth beneath it. A gentle smile is enough; a wide human grin will overpower the animal's delicate face. Check that the eyes sit below the ear bases and that the muzzle still projects naturally. Do not move the guide shapes to compensate for misplaced details.
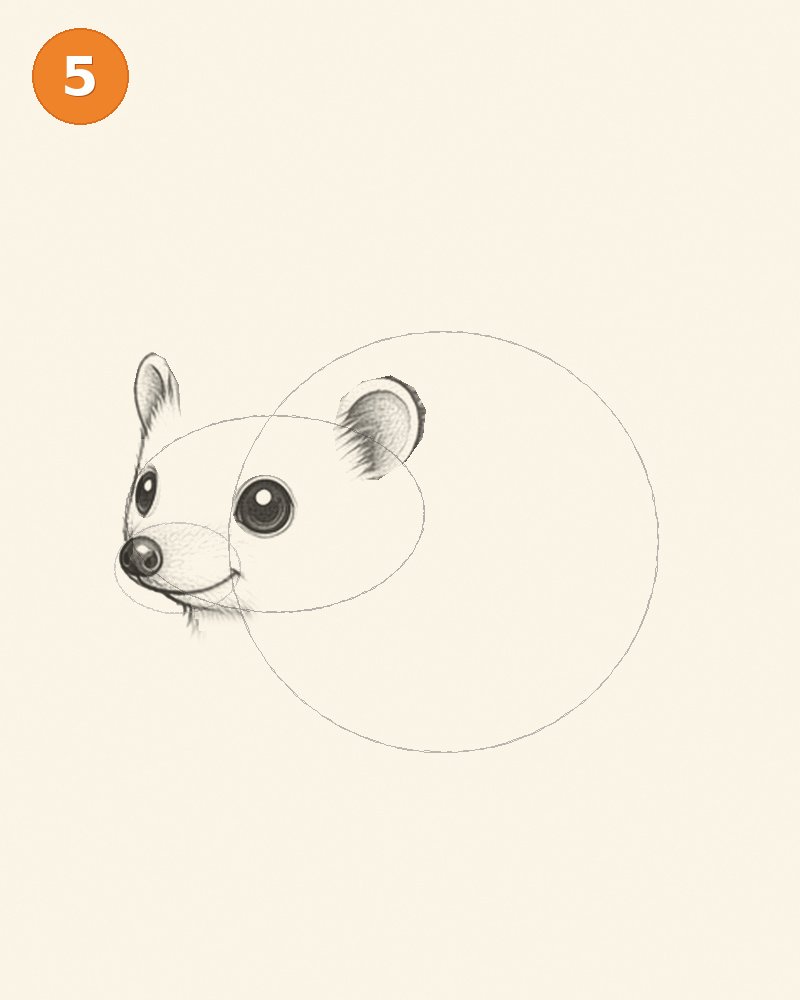
Step 6: Connect the soft chest and front feet
Bring the face contour downward into a softly furred chest, then add the short front legs and little feet. Their outlines should connect to the body rather than sit as detached shapes underneath it. Suggest toe divisions with a few small marks, keeping them lighter than the eye and nose. The animal's weight rests low to the ground, so avoid long straight legs. Keep the back guide visible behind the chest. This lets you judge how much of the seated body will later be covered by the quill cloak.
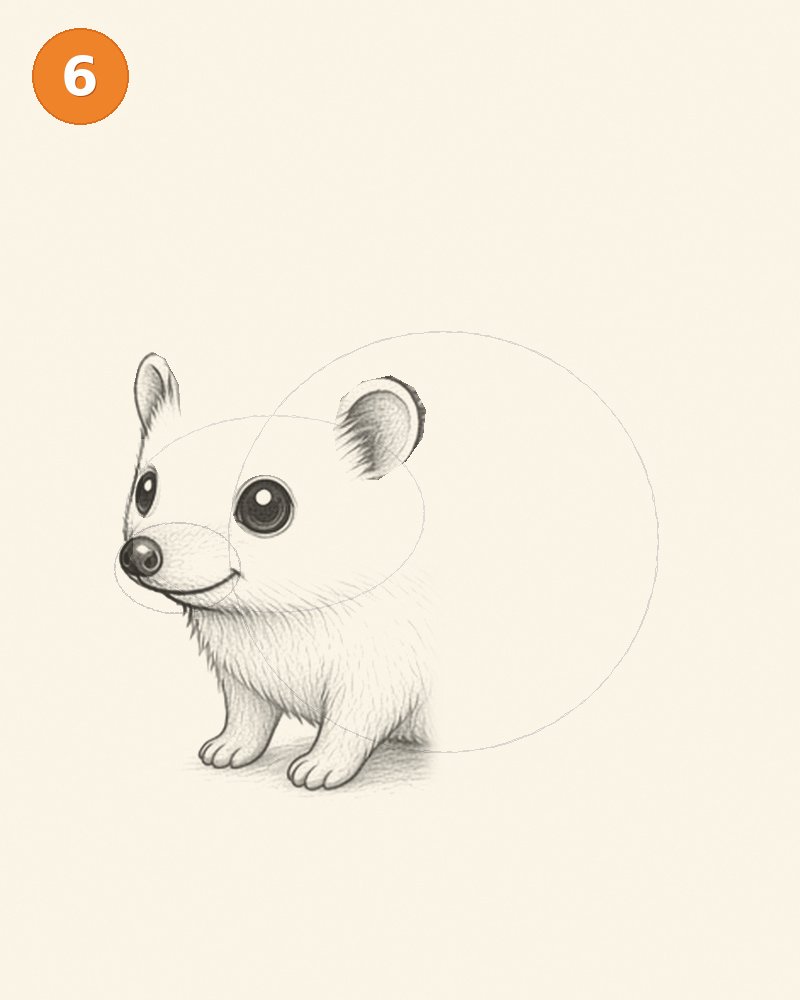
Step 7: Build the whole quill cloak and hind foot
Establish the full domed back and its layered quill cloak, working from the forehead transition over the crown toward the rump. Group the short pointed spines into overlapping rows instead of scattering individual spikes randomly. Their directions should follow the rounded surface of the back. Add the tucked hind foot beneath the rear of the body so the seated pose feels supported. The face remains soft and largely free of quills. This stage introduces the complete spine area; later work refines the fur and light rather than changing the animal's silhouette.
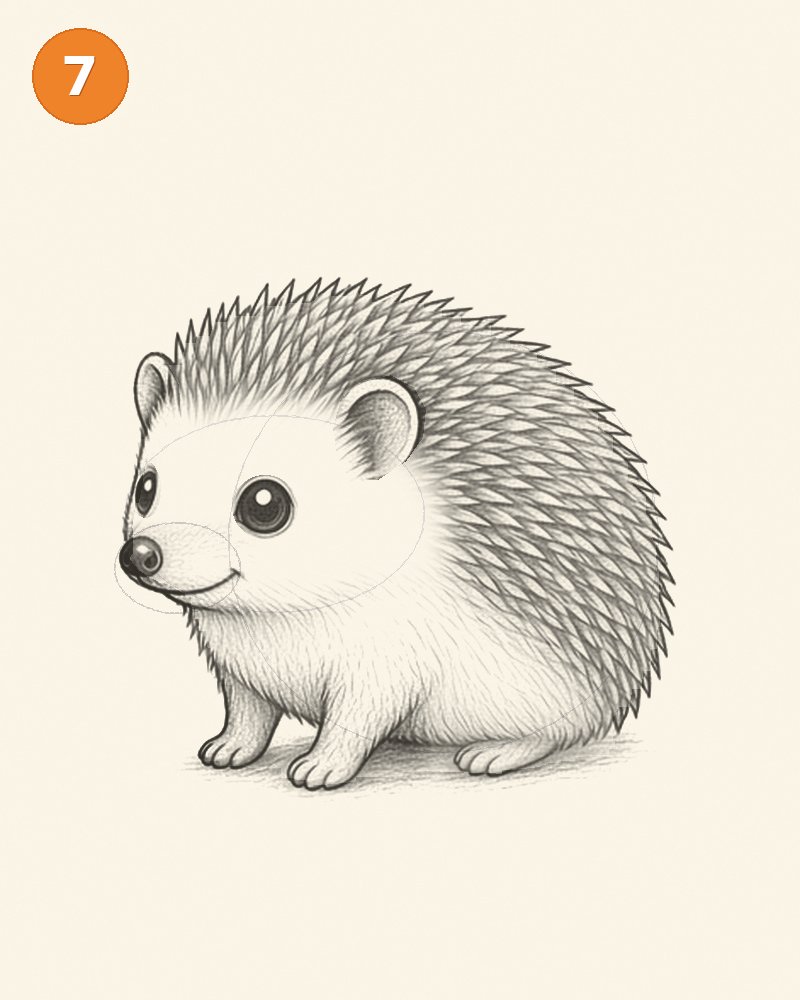
Step 8: Refine the face fur and overlaps
Add tiny tapered fur marks on the cheeks, chest and belly, directing them away from the nose and down around the body. Clarify where the pale face overlaps the front edge of the quill cloak. A few darker marks between spine rows suggest depth without turning every quill into a thick black triangle. Keep the remaining construction arcs visible but pale. At this point the whole animal should be recognizable in graphite. Resist adding the same dense texture to the face as to the back; their contrast is essential to the drawing.
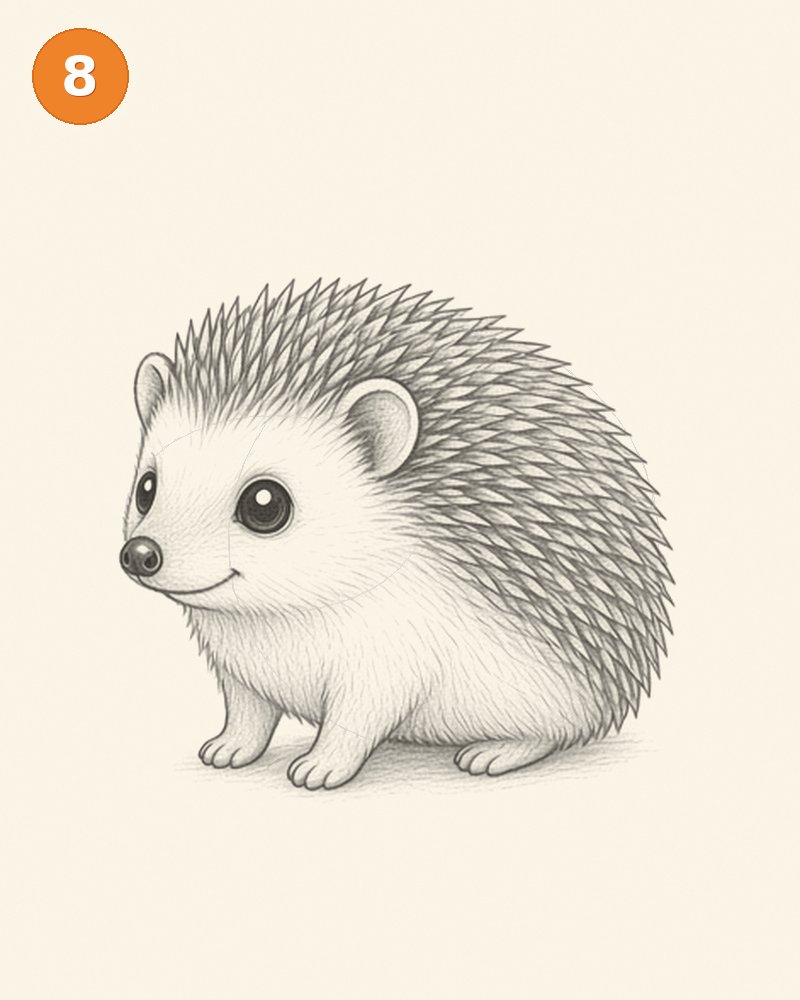
Step 9: Erase the remaining guide ovals
Lift the planning ovals with a soft eraser, using gentle dabs around the nose, eye highlights and small feet. Preserve the real spine tips and the fine cheek fur. If an important contour fades, restore only that short section instead of outlining the entire animal more heavily. The cleaned drawing must retain exactly the same back dome, ear positions and body proportions. Look especially near the forehead and belly for leftover oval arcs. This stage removes construction information; it does not add another row of quills or enlarge the animal.
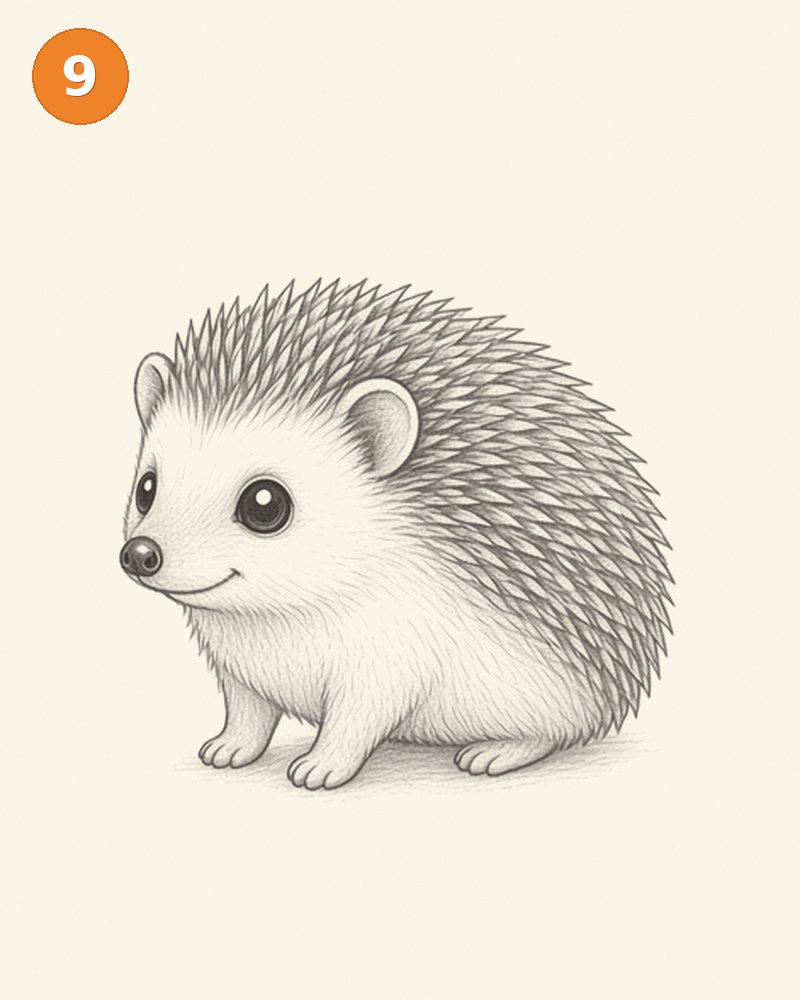
Step 10: Add soft graphite volume
Shade beneath the chin and along the lower side of the body, keeping the top-left area lighter. Add a little depth between selected quill rows, especially toward the lower back, rather than filling every gap equally dark. The underside of each foot can receive a small contact shadow. Use short strokes on the fur and more directional tapered strokes among the quills. Leave the forehead and muzzle bright so the eyes and nose stay readable. The result should feel rounded and softly lit, not metallic or covered in a uniform dark pattern.
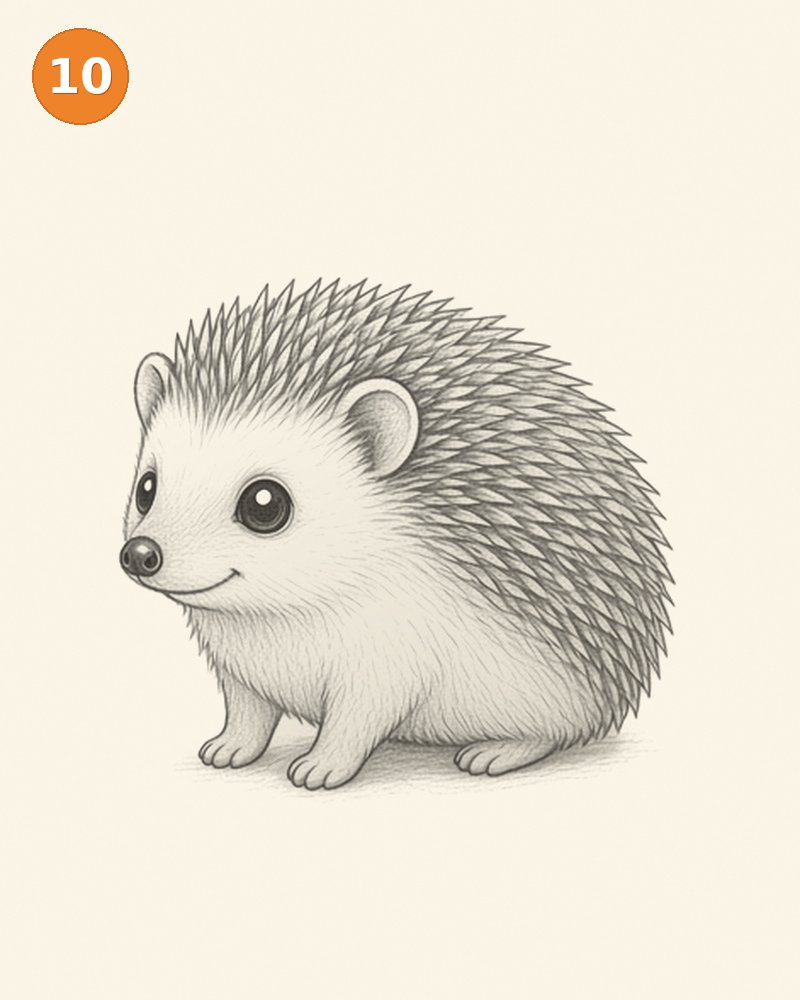
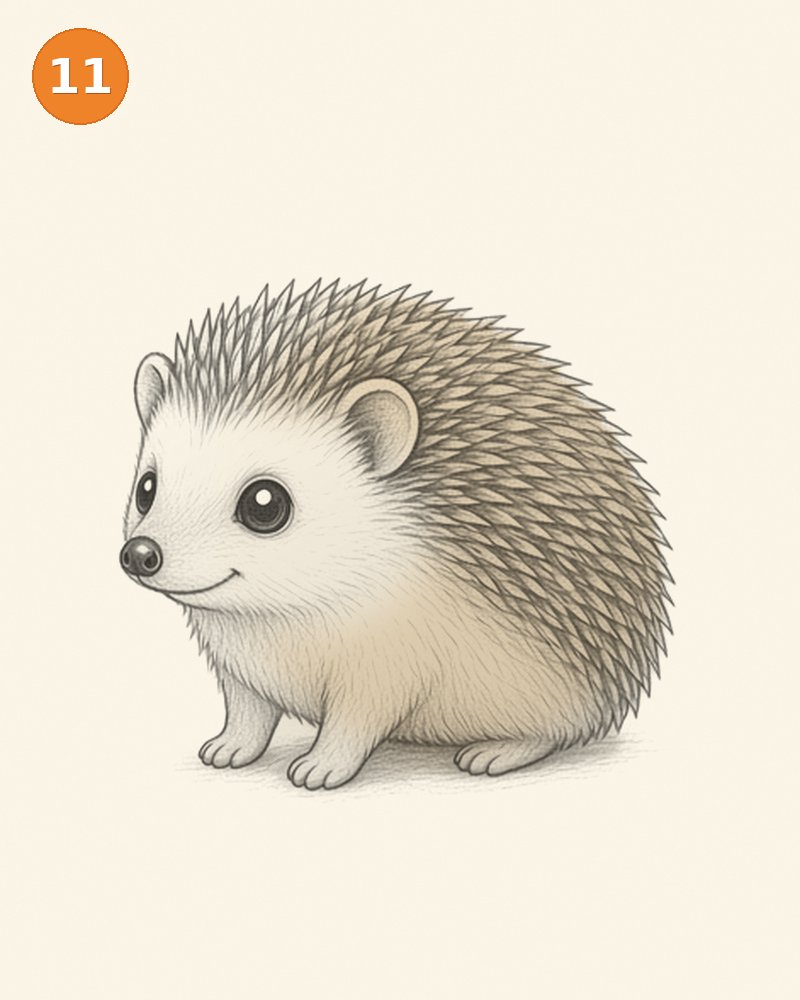
Step 11: Apply a warm brown pencil base
Lay a very light warm-brown base across the quill cloak and a softer beige over the lower body. Keep the face mostly cream. Use thin colored-pencil layers so the graphite quill edges and paper grain remain visible through the color. Follow the direction of the spines rather than scrubbing back and forth across them. Work around the black eyes, nose and highlights. If one area becomes too dark, soften it gradually with cream pencil; do not cover the whole drawing with a heavy pale layer that erases the original texture.
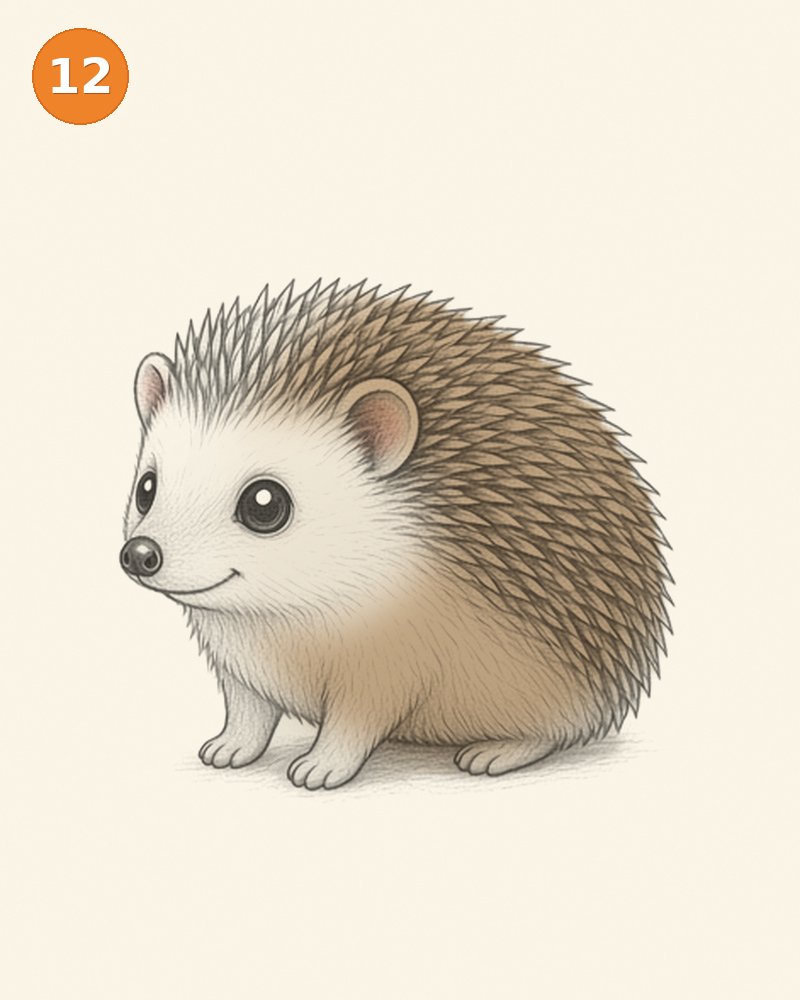
Step 12: Finish the quills and subtle pink ears
Deepen selected brown shadows near the lower back and between overlapping spines. Add a restrained touch of pink inside the ears, then blend its edge into the cream face with light pressure. Preserve the small bright eye highlights and the rounded nose. Compare the finished version with the clean graphite drawing: all feet, ears, quills and facial features should remain in the same places. Stop before every spine has equal contrast. A varied mix of light and darker quills creates a softer, more natural cute animal than a row of identical rigid triangles.
Common hedgehog drawing mistakes and how to fix them
The most frequent mistake is drawing quills all over the face. Leave the cheeks, muzzle and underside softly furred so the back cloak has a clear boundary. Another problem is making the spines excessively long and straight, which changes the animal's character toward a porcupine. Keep them short, layered and directed around the back. If the feet disappear, check that the lower body has not been enlarged while adding quills. Dark outlining around every spine can create a harsh saw-blade edge; vary pressure and use some softer interior marks. Finally, avoid making both ears and both eyes identical in this turned pose. The farther features should appear narrower without vanishing completely.
Colored-pencil ideas
Warm brown, beige and cream produce a gentle natural-looking palette. Try a chestnut back with a pale cream face, or use gray-brown quills for a cooler version. Keep the ears a muted pink rather than bright red. An imaginative autumn version can introduce a little golden ochre into the light side of the back, while still preserving the graphite texture. For any palette, choose the lightest areas before adding dark color. The face should remain visually quieter than the busy cloak, allowing the shiny eye and tiny nose to hold attention.
Try a cute kawaii variation
For a kawaii hedgehog, round the body slightly more and make the near eye a little larger, but retain the projecting muzzle and quill cloak. A tiny mouth and very soft blush can make the expression sweeter without adding human features. You can simplify the spine rows into a few overlapping groups in a separate miniature sketch. Avoid turning the spines into evenly spaced decorative stars; they should still follow the back's curved surface. Keep the feet short and grounded. Simplicity works best when the animal’s most recognizable anatomical contrasts remain intact.
A calm way to practice
Before adding each new feature, look at the whole silhouette from an arm’s length away. Compare the size of the head with the body and check the empty space around the animal. If a new line seems wrong, lighten that small area before continuing instead of hiding it beneath heavier shading. A useful practice routine is to repeat only the first two construction stages on a scrap page several times, then choose the clearest version for details. Keep your wrist relaxed and turn the paper when a curve feels awkward. Progress comes from understanding the shapes, not from matching every pencil grain in an example. Your drawing can be recognizably your own while following the same anatomical plan.
Frequently asked questions
Should the face have quills?
No. Draw soft fur on the face and underside, with quills concentrated on the back. This texture contrast is one of the clearest ways to identify a hedgehog.
How many individual quills must I draw?
There is no required count. Arrange convincing overlapping groups around the rounded back, varying their length slightly. You are describing a surface, not counting every spine.
Why does my hedgehog look like a porcupine?
Check the spine length and body shape. Very long needle-like quills and a less rounded body can change the impression. Shorter layered spines and a soft muzzle help.
Can young children simplify the lesson?
Yes. They can use fewer quill rows and omit detailed fur shading. Preserve the two main guide shapes, rounded ears, projecting nose and short visible feet.
Can I keep the drawing black and white?
Yes. The cleaned and shaded graphite version is a complete drawing. Color is an optional finishing choice, not something needed to make the animal recognizable.
More drawing and coloring ideas
Keep practicing with these related Capybara Mag resources. Follow a different animal tutorial to compare shapes, or take a relaxed coloring break between drawing sessions.