This lesson shows how to draw a betta fish with a rounded body, a bright curious eye and flowing fan-shaped fins. Twelve cumulative stages take the same fish from light construction ovals to a finished turquoise-and-purple colored-pencil drawing. The fins, mouth and eye stay in fixed positions as the details develop, making it easier to understand what each new mark contributes. Our cute version uses a gentle turned side view and slightly enlarged eye rather than strict scientific proportions. The important distinction is between the compact body and the broad delicate fins. Build that relationship first, then add fin rays, scales, soft shadows and color without losing the pencil texture.
What you need for this betta fish drawing
Choose a regular graphite pencil, a soft eraser and a sheet of warm white or cream paper. An HB pencil works for the guides; a softer pencil can deepen small shadows, but one ordinary pencil is enough. Colored pencils are optional for the final two stages. Keep a clean scrap sheet under your drawing hand to reduce smudging. Use light pressure for planning, medium pressure for selected contours and stronger pressure only for small dark details. An adult can help younger children prepare a sharp pencil safely. Do not worry about finishing quickly: pause after the guide shapes and again before adding texture. These checks prevent small placement mistakes from becoming difficult corrections later.
Understand the betta fish anatomy
A betta has a main body that narrows toward the tail, a dorsal fin above, an anal fin below, small paired fins near the front and a caudal fin forming the tail fan. This drawing uses a long-finned ornamental appearance; not every betta has fins of this size or shape. The visible pectoral fin sits just behind the gill area. Two narrower ventral fins hang below the front of the body. Fin rays should radiate outward from their attachment regions, not run as parallel stripes across the whole fish. Scales belong on the body, while the flowing fins are described with rays and light membranes. The mouth is a small rounded shape at the front of the head, and the gill cover curves behind the eye. Unlike the furry animals in other lessons, a fish needs no ear shapes, paws, whiskers or ground-contact shadow.
Follow the 12 cumulative drawing steps
Step 1: Place a horizontal body oval
Draw a broad horizontal oval near the middle of the page, leaving generous space above, below and to the right for the flowing fins. Use a pale graphite line so this planning shape can be removed later. The body oval establishes the fish's fixed size and position; it is not the outline of the tail fan. Keep the left end available for the rounded face. Before proceeding, check that the future tail will have room to open without touching the page edge.

Step 2: Add the rounded head guide
Overlap a smaller round head guide at the left end of the body oval. Its lower edge should line up naturally with the fish's underside rather than dangling beneath it. This guide helps separate the face from the trunk and provides a reference for the eye and gill cover. Keep both ovals light and visible. Our fish looks slightly toward the viewer, so the near cheek will appear rounded instead of becoming a sharp triangular profile. Do not darken the eye or draw scales at this early stage.

Step 3: Map the flowing fin fans
Sketch the broad dorsal fin above the body, the rounded tail fan to the right and the lower anal fin beneath the rear half. Add the narrow paired fin shapes below the front. Treat these as light contour plans: a few delicate breaks in the sketch are fine because the final fin edges will be clarified later. Vary the curves so the fins feel soft rather than like a mechanical circle. Keep every fan attached to the same body guide and reserve their interiors for the later ray details.
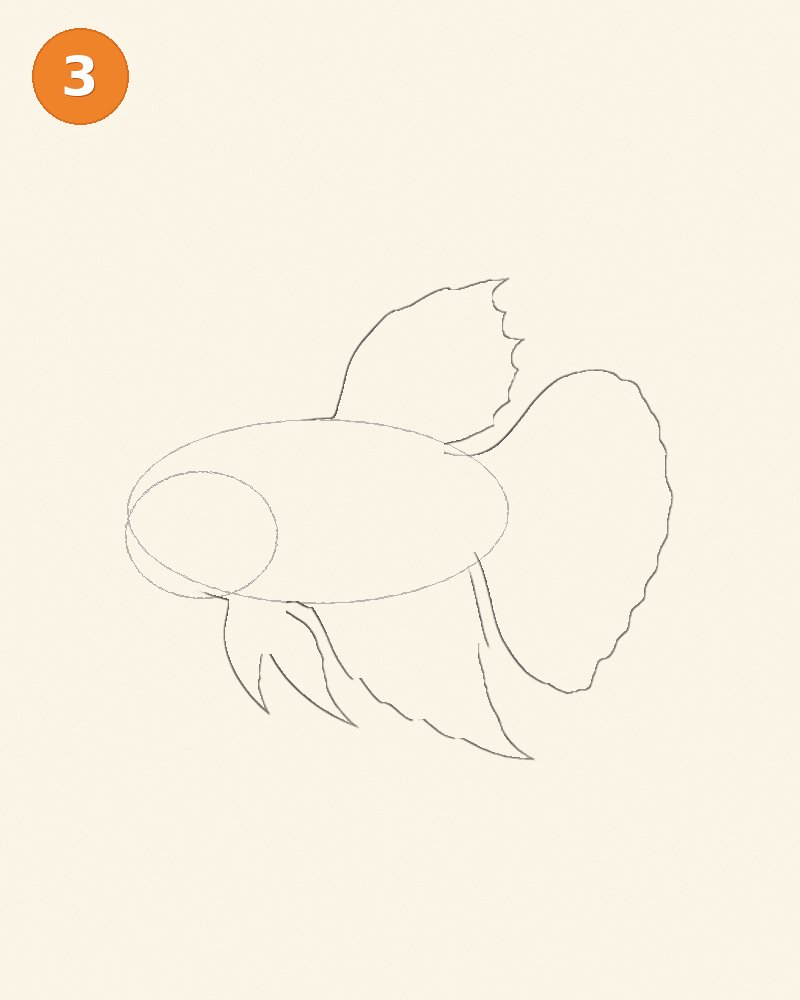
Step 4: Define the forehead and small mouth
Begin replacing the front of the head guide with the real rounded forehead and cheek contour. Add a small muzzle or mouth guide at the left tip, then shape the little curved opening. The mouth should project only a little; a long snout changes the character of the fish. Leave the body oval and fin plans visible behind this new facial outline. Use gentle pressure to avoid a harsh cartoon border. Check that the head has not shifted forward or grown while you replace the construction arc with the actual contour.
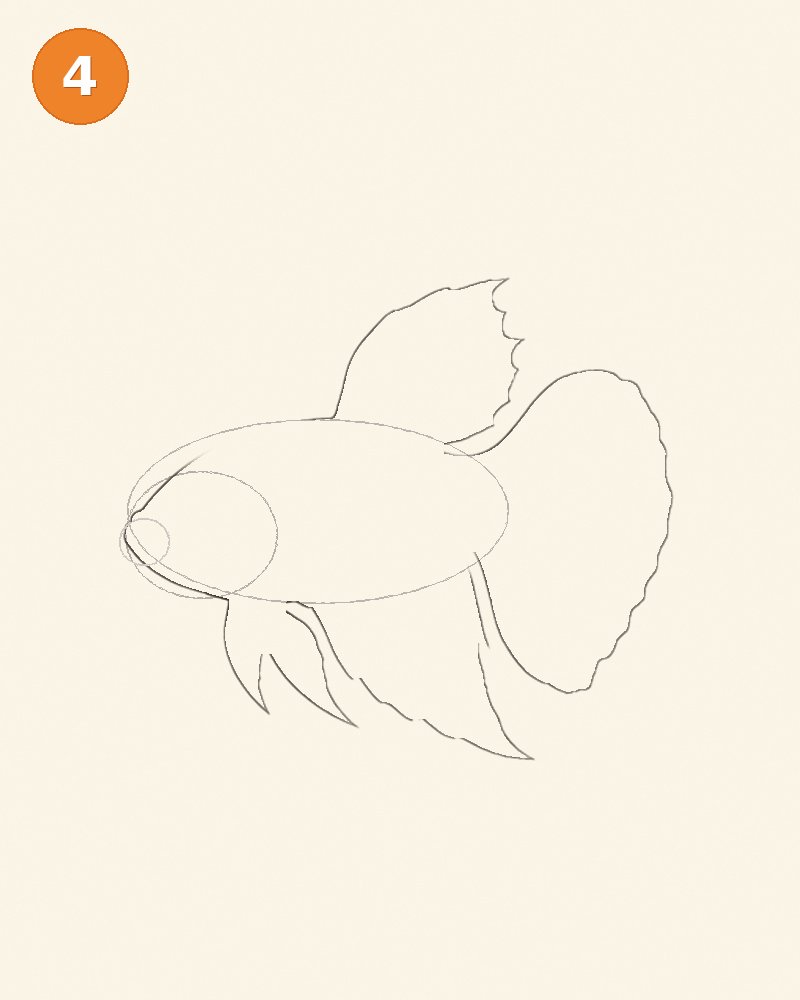
Step 5: Draw the bright eye and gill cover
Place the large near eye above and behind the mouth, reserving a small clean highlight inside its dark pupil. Add a thin outer eye ring and a curved gill cover behind it. The gill line should wrap around the head rather than cut straight down like a rectangle. A few small scale suggestions near the cheek are enough at this stage. Keep the eye as the main dark accent. Compare the mouth, eye and gill positions with the head guide before adding more detail; their relationship establishes the fish's gentle expression.
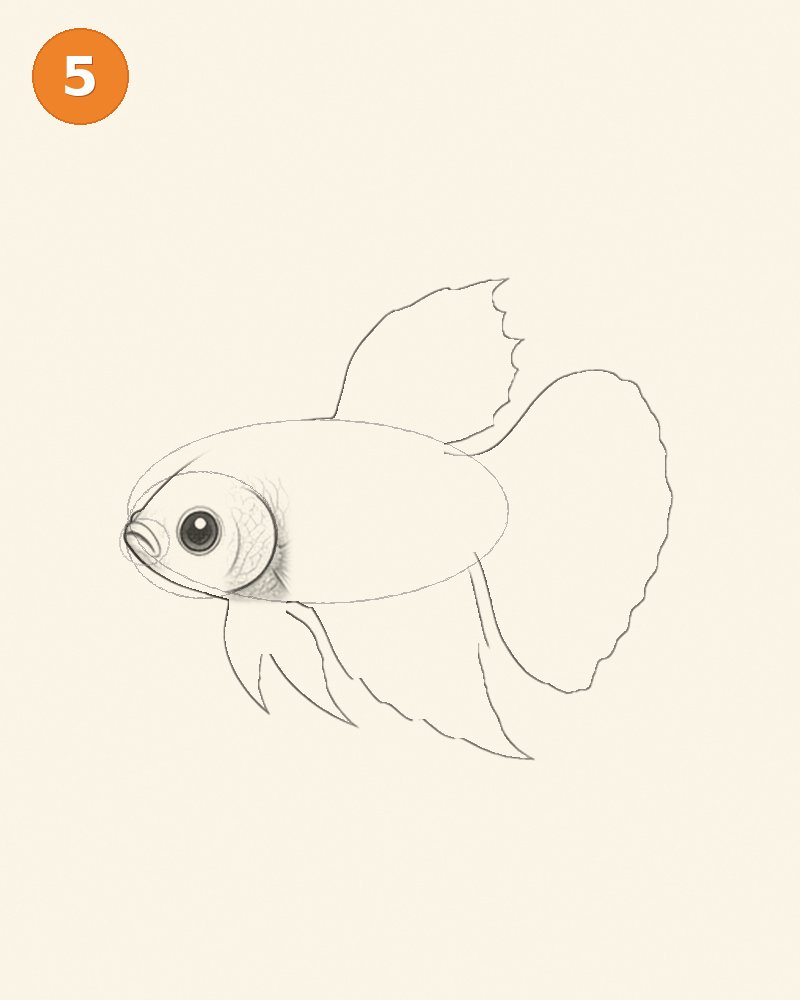
Step 6: Develop the small front fins
Draw the visible pectoral fin just behind the gill region, giving it a rounded fan outline. Add fine rays spreading from its base toward the outer curve. Refine the two narrower ventral fins below the front of the body, tapering their tips without making them rigid spikes. Retain the broad dorsal, tail and anal fin plans from the previous stages. The front fins overlap parts of the body and lower fin area, so use lighter marks behind them to show which edge is nearest. Do not attach a pectoral fin to the middle of the face.
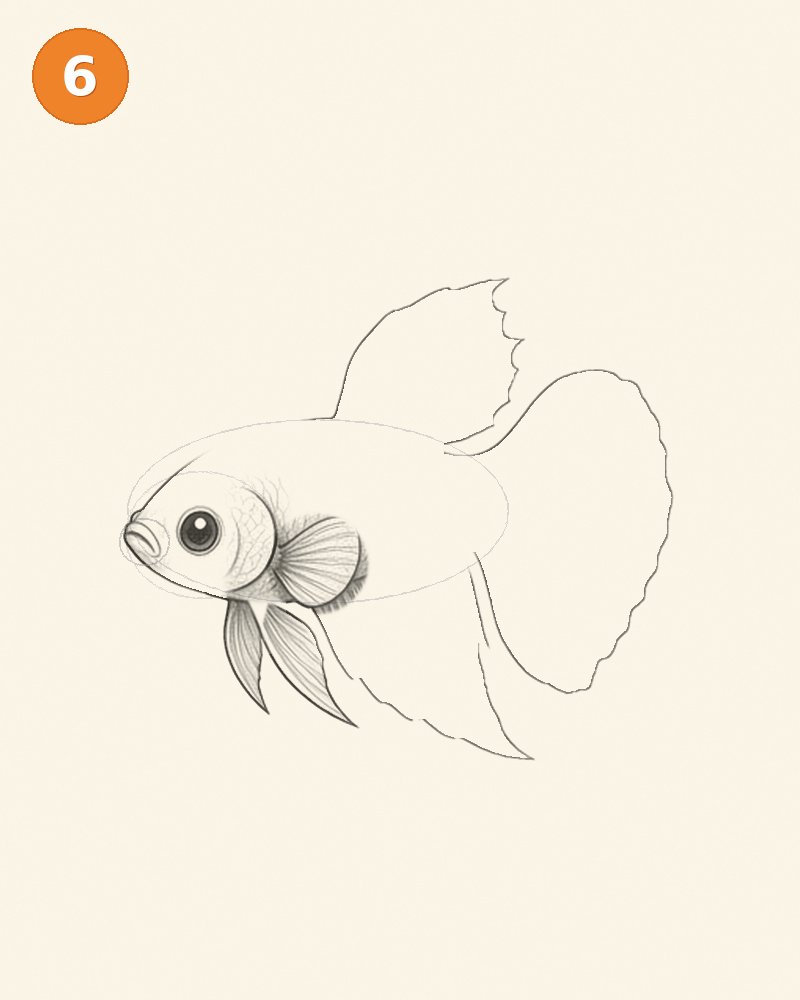
Step 7: Complete the large fins and their rays
Clarify the full body contour and complete the broad dorsal, caudal and anal fins. Add flowing rays that radiate from their roots to the curved outer edges. Let their spacing widen toward the tips, following the expanding fan shapes. Some fin edges can have gentle scallops or shallow notches rather than an identical smooth arc. The body itself remains relatively plain at this stage; we will add its scale texture next. Keep the earlier eye, mouth, gill cover and paired front fins intact. All the major anatomy is now established in the same fixed pose.
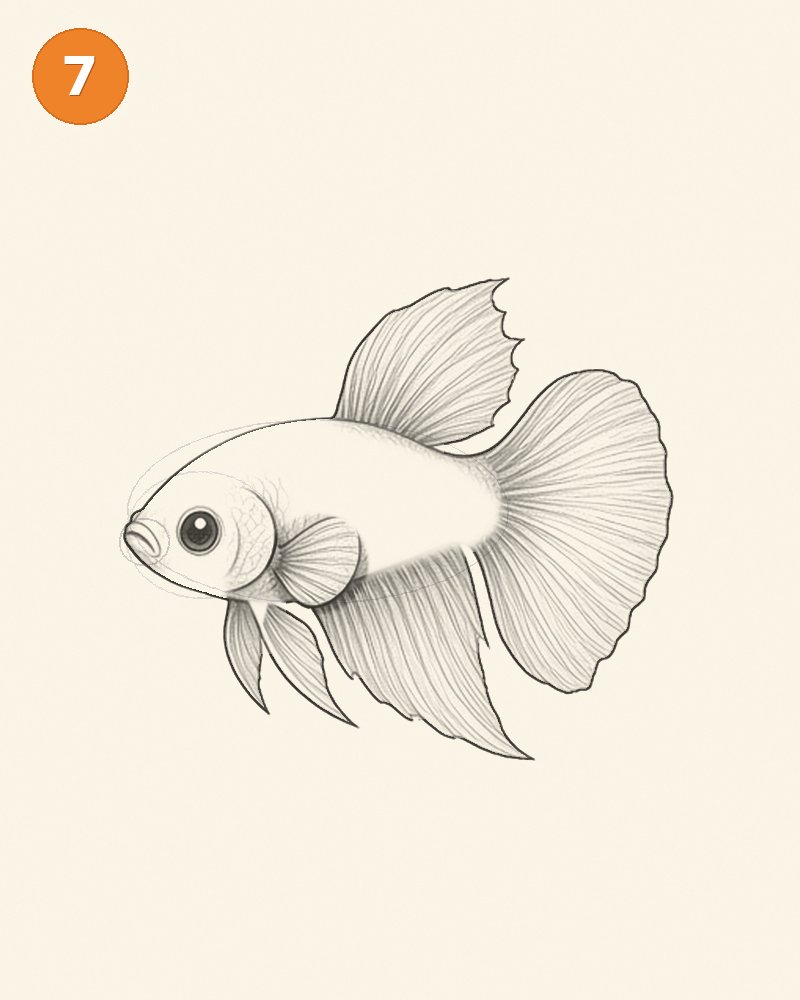
Step 8: Add the body scales and refine overlaps
Suggest overlapping scales along the body with light curved marks, making them smaller near the head and allowing them to follow the rounded surface. Do not put the same scale pattern across the fins; their rays provide a different texture. Refine the transitions where the dorsal and anal fins meet the trunk, keeping those roots softer than the eye and outer silhouette. The pale construction ovals remain visible beneath parts of the drawing. Use a lighter touch than you think you need, because dense dark scale outlines can quickly overpower a small friendly fish.
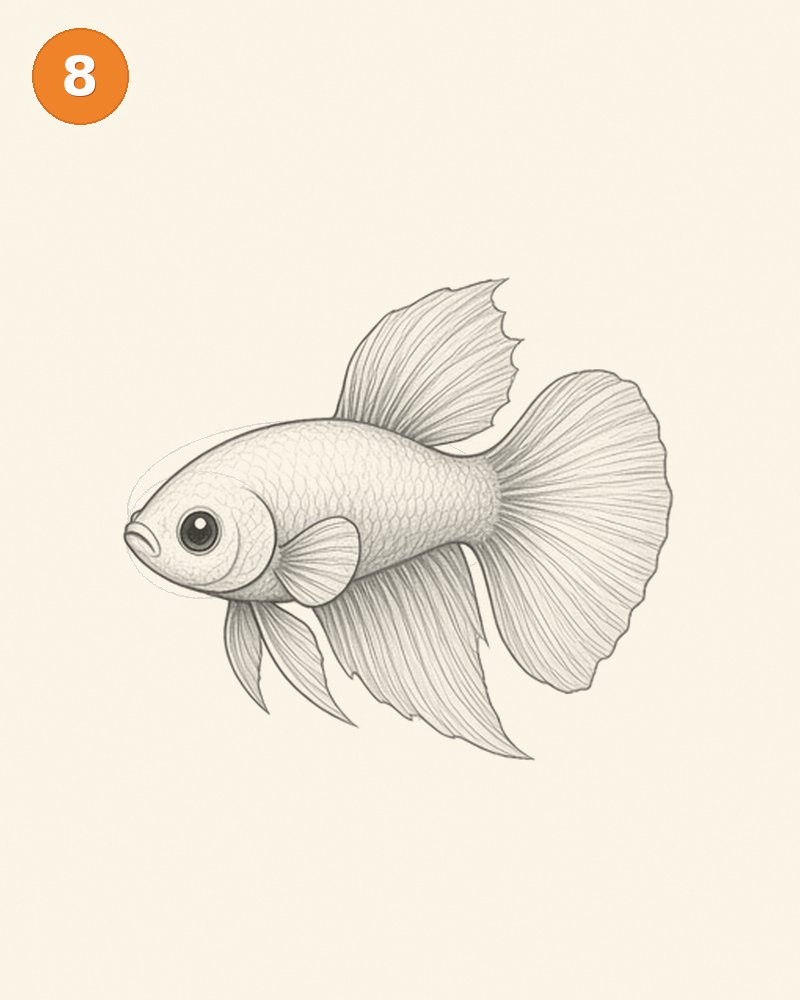
Step 9: Lift the remaining construction ovals
Use a soft eraser to remove the head and body guide arcs without rubbing away the eye highlight, fin tips or fine scale pattern. Work in small areas and restore only any real contour that becomes too faint. The cleaned drawing should still match the previous fish exactly in size, position and fin shape. Look carefully across the forehead, upper back and lower body for leftover planning curves. Do not replace the entire fish with a newly drawn outline. This cleanup stage makes the existing anatomy clearer while preserving the delicate graphite textures already built.
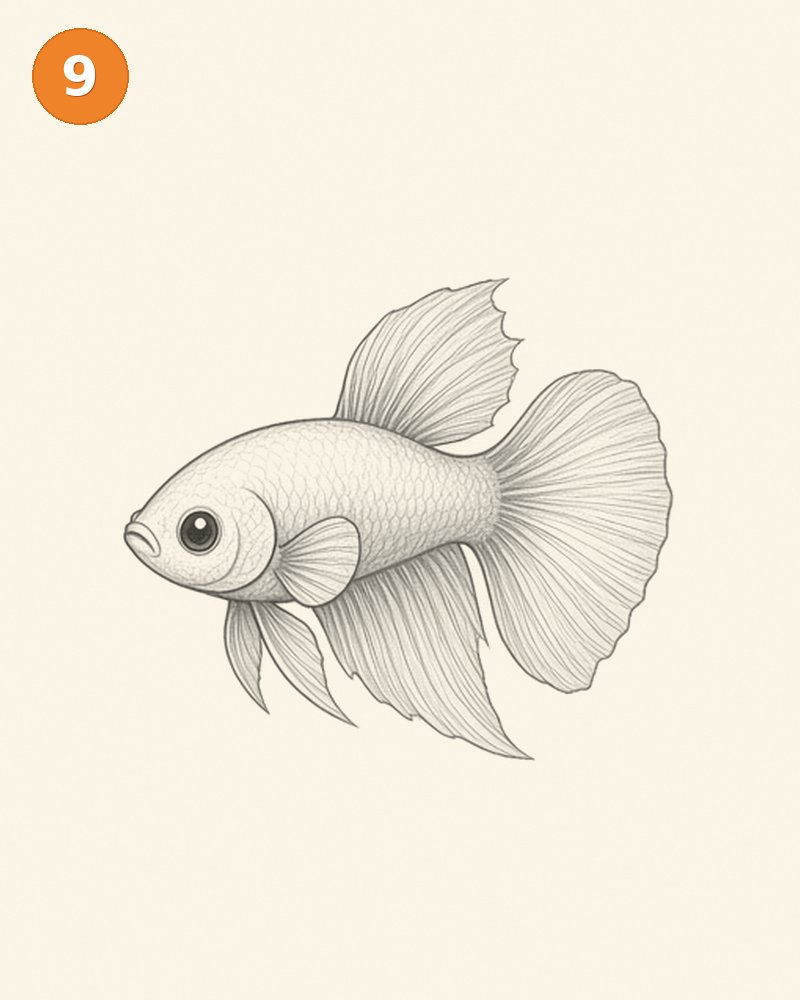
Step 10: Shade the rounded body and fin roots
Add soft graphite shading along the lower body and near the roots of the flowing fins, keeping the upper-left area lighter. On the body, curved gentle strokes suggest volume beneath the scales. On the fins, follow the rays and allow the thin outer edges to remain relatively light. Avoid shading every ray equally dark or the fins will resemble stiff folded cardboard. Keep the mouth and eye readable. Since the fish is floating, do not add a ground-contact shadow beneath it; a clean cream background keeps attention on its flowing silhouette.
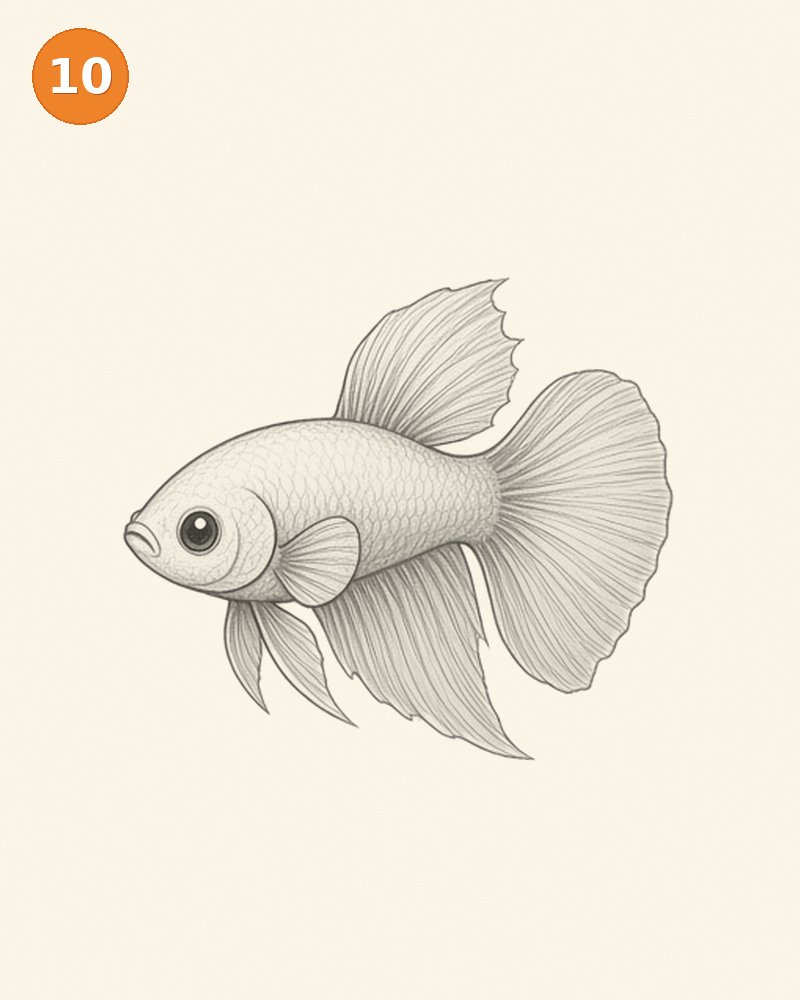
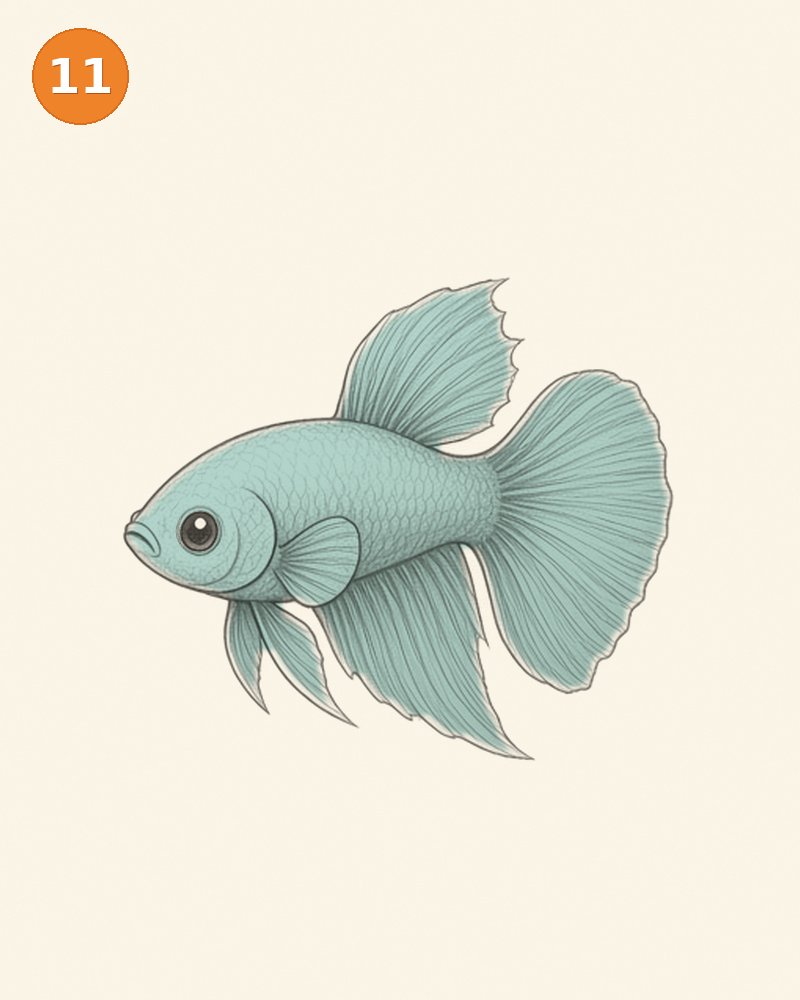
Step 11: Lay a translucent turquoise base
Apply a light turquoise colored-pencil layer over the body and a gentle first tint across the fins. Work with low pressure so graphite scales and ray lines remain visible through the color. Follow the body curves around the trunk and the outward ray directions on the fans. Leave the eye highlight completely clean. A thin base layer is easier to adjust than an opaque block, especially where the small pectoral fin overlaps the body. Keep the paper grain visible and allow lighter areas along the top to preserve the same light direction as the graphite shading.
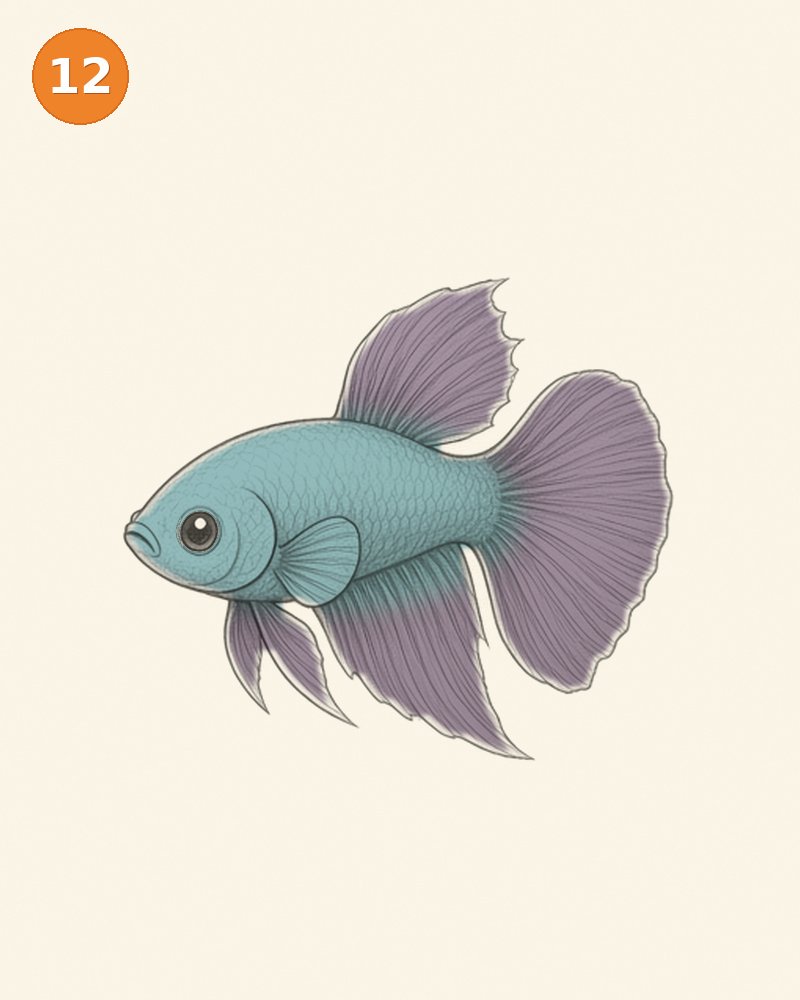
Step 12: Finish the purple fins and cool shadows
Deepen the turquoise selectively on the lower body, then introduce muted purple and lavender over the large flowing fins. Let some of the turquoise base remain visible near their roots to connect the palette. Preserve the thin dark rays rather than covering them with solid color. Check that the mouth, gill cover, eye and all fin tips stay in their original places. The final result should still look like colored pencil on cream paper, not a flat digital silhouette. Stop when the contrast between the compact body and airy fins feels clear and balanced.
Common betta fish drawing mistakes and how to fix them
One common mistake is making the tail larger by moving its attachment point away from the body. Expand the fan within the original plan instead. Another is drawing fin rays as evenly spaced parallel stripes; they should radiate from the fin roots and open outward. Keep scales on the body rather than repeating them across the delicate membranes. If the fish looks stiff, vary the outer curves and use lighter pressure near the fin tips. Do not add a second visible eye simply because mammals in other lessons show two; our turned side view emphasizes one near eye. Finally, protect the tiny highlight while coloring. Filling it with turquoise removes much of the friendly expression.
Colored-pencil ideas
The featured palette combines a turquoise body with muted purple fins, preserving the original graphite underneath. A blue-and-lavender variation can use the same light direction and shading plan. For a warm alternative, try coral fins with a pale gold body, working in thin layers so the dark rays remain distinct. You can also keep a restrained monochrome blue scheme and use stronger contrast near the fin roots. Ornamental bettas display many colors, so the precise palette is flexible. The important drawing decision is keeping body scales and fin rays readable rather than burying both under heavy pigment.
Try a cute kawaii variation
For a kawaii variation, enlarge the eye slightly, round the forehead and shorten the mouth projection. Keep the body compact and the fins broad enough to remain recognizably betta-like. A tiny smile curve can be suggested subtly, but avoid human lips or eyelashes if you want an animal-only character. Try a simplified separate sketch with fewer scale marks and broader ray groups. The tail should still grow from the rear of the body, not float beside it. Cute proportions work best when the basic fin arrangement remains believable, even if the eye and cheek are deliberately exaggerated.
A calm way to practice
Before adding each new feature, look at the whole silhouette from an arm’s length away. Compare the size of the head with the body and check the empty space around the animal. If a new line seems wrong, lighten that small area before continuing instead of hiding it beneath heavier shading. A useful practice routine is to repeat only the first two construction stages on a scrap page several times, then choose the clearest version for details. Keep your wrist relaxed and turn the paper when a curve feels awkward. Progress comes from understanding the shapes, not from matching every pencil grain in an example. Your drawing can be recognizably your own while following the same anatomical plan.
Frequently asked questions
Do all betta fish have these long fins?
No. Betta fin shapes vary, and some have much shorter fins. This lesson uses a long-finned ornamental appearance so beginners can practice flowing fan shapes and rays.
Where should the fin rays begin?
They spread from each fin attachment region toward its outer edge. Their directions change with the fin shape; they are not one set of parallel lines across the entire fish.
Should I draw scales on the tail?
Use scale suggestions on the main body. Describe the tail and other flowing fins with rays and light membrane shading instead of repeating the same body-scale texture.
Can I use different colors?
Yes. Choose a body color and a compatible fin color, then keep the graphite visible under thin pencil layers. Preserve the eye highlight regardless of the palette.
How can I simplify the lesson for a younger child?
Use fewer scale marks and fewer ray lines while preserving the main body oval, rounded head and correctly placed fin fans. The silhouette matters more than dense detail.
More drawing and coloring ideas
Keep practicing with these related Capybara Mag resources. Follow a different animal tutorial to compare shapes, or take a relaxed coloring break between drawing sessions.